Ever dreamt of going live, capturing instant audience energy, and then magically turning those electrifying moments into viral YouTube Shorts? While direct live streaming into the Shorts feed isn't a native feature (yet!), mastering the Technical Setup & Best Practices for Streaming to Shorts Optimization can bridge that gap, transforming your longer live content into bite-sized, scroll-stopping masterpieces. This isn't just about technical wizardry; it's about crafting a smart, data-driven strategy to leverage one of YouTube's most powerful discovery engines.
For creators looking to amplify their reach and engagement, understanding this two-pronged approach—live streaming first, then meticulously repurposing—is an absolute game-changer. It’s an investment in your content, allowing you to get double the mileage and connect with different segments of your audience in ways that truly resonate.
At a Glance: Your Pathway to Shorts Success
- No Direct Live to Shorts (Yet!): YouTube Shorts does not currently support direct live streaming into the Shorts feed. Your strategy involves streaming a standard live video, then editing it down.
- Gear Up Right: Invest in a quality camera, a dedicated external microphone, a stable wired internet connection, and a robust computer for smooth streaming.
- OBS is Your Command Center: Learn to configure streaming software like OBS Studio for optimal video and audio capture.
- The Repurposing Magic: The core of this strategy lies in post-stream editing. Download your live recording, identify compelling 15-60 second clips, and critically, crop them to a 9:16 vertical aspect ratio.
- Hook, Crop, Caption: Shorts thrive on instant engagement. Start strong, ensure your content is perfectly framed vertically, and always include captions and text overlays.
- Consistency & Analysis: Regular uploads and deep dives into YouTube Analytics are crucial for understanding what works and refining your approach.
The Big Picture: Why Shorts Matter (and How Live Fits In)
YouTube Shorts has rapidly evolved into a discovery powerhouse, offering creators an unprecedented opportunity for channel growth. It’s a different beast from long-form content, optimized for quick consumption and mobile viewing. The Shorts algorithm loves content that hooks viewers instantly, keeps them watching, and encourages interaction. This means that while your main live streams might serve a dedicated audience with in-depth content, Shorts are your funnel for bringing new eyes to your channel.
The current workaround—streaming a traditional live video and then editing it for Shorts—is not merely a compromise; it’s a strategic advantage. It allows you to produce raw, authentic content in real-time, engaging with your community live, and then meticulously select the most engaging, shareable moments to reach a broader audience. This dual approach maximizes your content’s lifecycle and impact. It’s a crucial aspect of why mastering the YouTube Shorts streaming worth can significantly boost your channel's visibility.
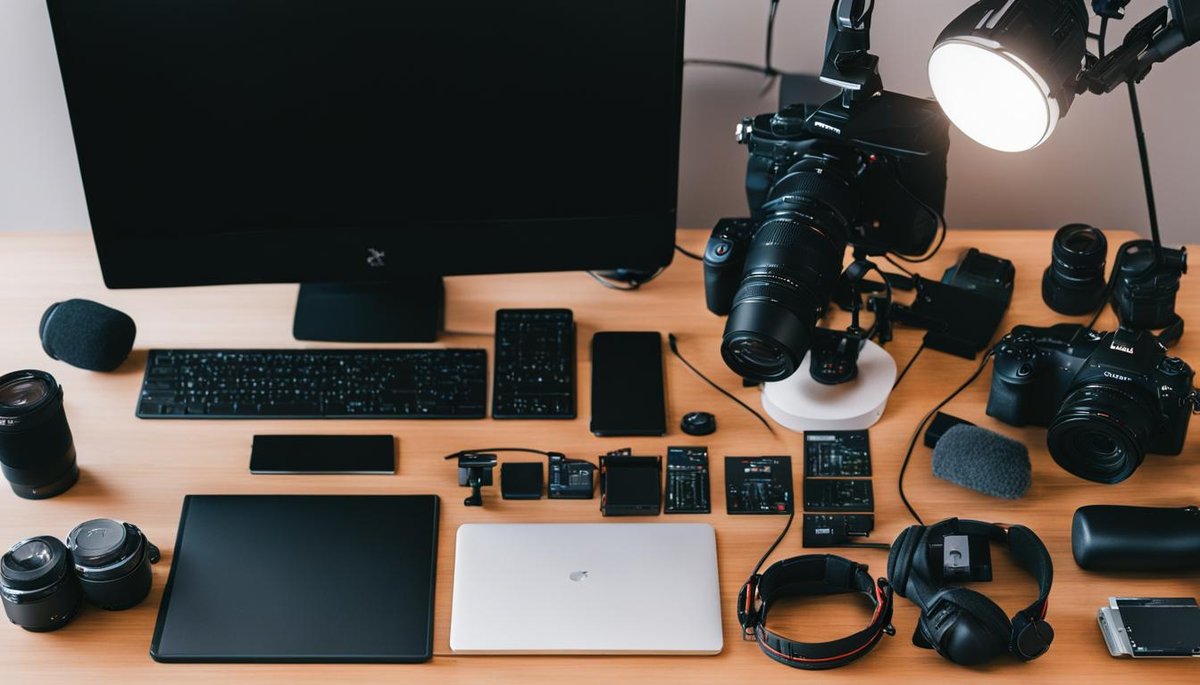
Your Essential Toolbelt: Technical Prerequisites for Live Streaming
Before you even think about hitting 'Go Live,' a solid technical foundation is non-negotiable. Quality gear isn't just about looking professional; it's about delivering a smooth experience that keeps viewers engaged and minimizes technical headaches.
1. Your Account & Channel
- Verified Google Account: This is the bedrock. Ensure your Google account is verified, and you have an active YouTube channel.
- Monetization (Optional but Recommended): While not strictly required for streaming, having monetization enabled signals a more established channel and offers future opportunities.
2. Visual Fidelity: Your Capture Device
- Webcam: A high-resolution webcam (minimum 1080p at 30fps) is a good starting point. Brands like Logitech and Razer offer excellent options.
- Smartphone: Modern smartphone cameras (4K preferred) are incredibly capable. You’ll need a stable mount and possibly an app like DroidCam or EpocCam to use it as a webcam.
- Dedicated Camera: For the best quality, a DSLR or mirrorless camera with a clean HDMI output, paired with a capture card (e.g., Elgato Cam Link, AverMedia Live Gamer), provides professional-grade visuals.
3. Audio Excellence: Your Microphone
- External Microphone is King: Do not rely on your camera's built-in mic. A dedicated external microphone is the single most impactful upgrade you can make to your stream quality.
- USB Microphones: Convenient for beginners (e.g., Blue Yeti, Rode NT-USB Mini).
- XLR Microphones: Offer superior sound quality and flexibility but require an audio interface (e.g., Shure SM7B, Rode Procaster).
4. Your Control Center: Streaming Software
- OBS Studio (Recommended): Free, open-source, powerful, and highly customizable. It’s the industry standard for a reason.
- Streamlabs Desktop: A user-friendly alternative built on OBS, with integrated alerts and overlays.
- XSplit Broadcaster: A feature-rich option, but often subscription-based.
5. The Unsung Hero: Internet Connection
- Wired Ethernet: Ditch Wi-Fi for streaming if at all possible. A stable, wired Ethernet connection is paramount to prevent dropped frames and lag.
- Upload Speed: Aim for a minimum of 5 Mbps upload for 1080p streaming. Higher is always better, especially for higher resolutions or frame rates. Use an online speed test to verify.
6. Power Under the Hood: Computer Specs
- Multi-Core CPU: Your processor handles encoding the video. A modern multi-core CPU (Intel i5/Ryzen 5 or better) is essential.
- Dedicated GPU: A dedicated graphics card (NVIDIA GeForce GTX/RTX or AMD Radeon RX) is highly recommended, especially if you plan to use hardware encoding (like NVENC) to offload work from your CPU.
Setting the Stage: YouTube Channel Prep
With your gear assembled, it's time to ensure your YouTube channel is ready for prime time.
1. Channel Verification
First, ensure your channel is verified. This unlocks crucial features like custom thumbnails, longer videos, and, importantly, live streaming.
- Access YouTube Studio: Go to studio.youtube.com.
- Navigate to Settings: Click 'Settings' in the left-hand menu.
- Channel Features: Select 'Channel' > 'Feature eligibility'.
- Enable Intermediate Features: Follow the prompts to verify your phone number. This typically takes a few minutes.
2. Enabling Live Streaming Functionality
Once verified, you need to enable the live streaming feature itself.
- Go to 'Create' > 'Go Live': In YouTube Studio, click the 'Create' button (camera icon) in the top right, then select 'Go Live'.
- 24-Hour Wait: Be aware that YouTube may impose a 24-hour waiting period when you enable live streaming for the first time. Plan ahead!
Your Command Center: Configuring Streaming Software (OBS Deep Dive)
OBS Studio is the workhorse of live streaming. Getting it configured correctly is crucial for a smooth, high-quality broadcast.
1. Install OBS Studio
Download and install OBS Studio from obsproject.com. Follow the setup wizard.
2. Add Your Sources: Video and Audio
In the 'Sources' panel at the bottom of OBS, click the '+' icon to add your inputs:
- Video Capture Device: Select your webcam, capture card, or smartphone camera app.
- Audio Input Capture: Select your dedicated external microphone. Make sure it's the correct device, not your webcam's mic.
3. Connect to YouTube: Stream Settings
This is where you tell OBS where to send your stream.
- Open OBS Settings: Click 'File' > 'Settings' (or 'OBS' > 'Preferences' on Mac).
- Navigate to 'Stream':
- Service: Select 'YouTube / YouTube Gaming'.
- Server: Leave as 'Primary YouTube Ingest Server'.
- Stream Key: This is unique to your YouTube channel. Go back to YouTube Studio, click 'Create' > 'Go Live', and copy the 'Stream Key' provided there. Paste it into OBS. Never share your stream key!
4. Optimize Your Output: Encoder & Bitrate
This determines the quality and efficiency of your video encoding.
- Navigate to 'Output':
- Output Mode: Set to 'Advanced'.
- Encoder:
- Hardware (Recommended): If you have a dedicated GPU, use its hardware encoder (e.g., NVIDIA NVENC, AMD AMF, Intel Quick Sync). This offloads work from your CPU and generally provides better performance.
- Software (x264): If you don't have a strong GPU, or prefer CPU encoding, choose 'x264'. You'll need a powerful CPU for this.
- Rate Control: Set to 'CBR' (Constant Bitrate) for consistent stream quality.
- Bitrate: For 1080p (1920x1080) at 30/60fps, a bitrate of 4500-9000 kbps is recommended. YouTube suggests 6000 kbps for 1080p at 30fps. Adjust based on your internet upload speed and content complexity.
- Keyframe Interval: Set to 2 seconds. This is a YouTube recommendation.
- Preset (Hardware Encoder): Choose 'Quality' or 'Max Quality'.
- Profile (Hardware Encoder): Set to 'Main' or 'High'.
5. Define Your Canvas: Video Settings
- Navigate to 'Video':
- Base (Canvas) Resolution: This is your monitor's resolution or the resolution you're working with in OBS. Typically 1920x1080.
- Output (Scaled) Resolution: This is the resolution your stream will be sent at. For most creators, 1920x1080 (1080p) is ideal.
- FPS (Frames Per Second): Choose 30 FPS for general content or 60 FPS for fast-paced gaming or action. Ensure your internet can handle 60 FPS.
Dialing In Your Broadcast Quality: Bitrate & Resolution Explained
Choosing the right bitrate is a delicate balance. Too low, and your stream looks pixelated; too high, and you might overload your internet connection, leading to drops.
- 1080p (1920x1080): Recommended for most content.
- 30 FPS: 3,000 to 6,000 kbps
- 60 FPS: 4,500 to 9,000 kbps
- 720p (1280x720): Good for slower internet.
- 30 FPS: 1,500 to 4,000 kbps
- 60 FPS: 2,500 to 6,000 kbps
Crucial Check: Always perform a test stream before going fully live. Stream to 'Unlisted' or 'Private' and monitor your stream health in YouTube Studio.
Going Live: Your First Broadcast (and What to Watch For)
You've set up everything; now it's time for the moment of truth.
1. Initiate Stream from OBS
- In OBS, click the 'Start Streaming' button.
- Monitor the bottom bar of OBS for any dropped frames or encoding issues. Green usually means good!
2. Manage Your Stream in YouTube Studio
- Go back to YouTube Studio's 'Go Live' page. You should see a preview of your stream.
- Fill in Details: Enter a compelling title, a detailed description (with relevant keywords), category, and tags. Set your privacy (Public, Unlisted, Private).
- Thumbnail: Upload a custom thumbnail.
- Click 'Go Live': Once your preview looks good and you're ready, click the 'Go Live' button.
- Engage: Respond to chat comments, moderate your stream, and monitor your stream health (look for 'Excellent connection' in YouTube Studio).
- End Stream: When you're done, click 'End Stream' in YouTube Studio (or stop streaming in OBS, then end in Studio).
The Transformation: Turning Live Streams into Shorts Gold (The Crucial Repurposing Phase)
This is where your stream truly becomes Shorts-optimized content. The key is in intelligent editing and formatting.
1. Download Your High-Resolution Recording
- After your stream ends, YouTube automatically archives it.
- Go to YouTube Studio > Content > Live. Find your stream and download the full-resolution archived recording. This is your raw material.
2. Arm Yourself with Editing Software
You'll need a robust video editor:
- Professional: Adobe Premiere Pro, DaVinci Resolve (free version available), Final Cut Pro (Mac).
- Mobile/User-Friendly: CapCut, InShot, KineMaster are excellent for quick edits directly on your phone, especially for vertical formatting.
3. Select Engaging 15-60 Second Segments
Scrub through your live stream. Look for:
- Climax Moments: The most exciting, funny, or surprising parts.
- Valuable Takeaways: A quick tip, a clear explanation of a concept.
- Emotional Peaks: Moments of strong reaction, triumph, or failure.
- "What just happened?" moments: Something unexpected or highly visual.
Remember, the optimal length for a Short is often between 15-45 seconds, not necessarily the full 60 seconds. High completion rates are a major signal to the algorithm.
4. Crucial Formatting: Going Vertical (9:16 Aspect Ratio)
This is non-negotiable for Shorts.
- Create a Vertical Project: In your editing software, start a new project with a resolution of 1080x1920 (or 2160x3840 for 4K).
- Crop and Adjust:
- Import your horizontal live footage.
- You'll need to crop significantly. Focus on the key action, your face, or the most important visual element.
- Center Key Elements: Ensure faces, text, and main action are in the central "safe zone" of the vertical frame, as the top and bottom edges can be obscured by YouTube's UI.
- Zoom/Pan: You might need to zoom in or pan across your original horizontal footage to fill the vertical frame effectively, always maintaining focus on the crucial elements.
5. Engage Visually: Text Overlays & Captions
Many viewers watch Shorts without sound, making visual communication vital.
- Auto-Generated or Custom Captions: Always add captions for accessibility and comprehension. Your editing software likely has auto-caption features, or you can manually add them for precision.
- Strategic Text Overlays: Use text to:
- Hook viewers in the first few seconds (e.g., "Watch me try to..." or a provocative question).
- Highlight key information or steps.
- Provide context or labels.
- Create a call-to-action.
- Legibility is Key: Use bold, high-contrast fonts. Avoid placing text too close to the edges. Synchronize text appearance with audio and visuals for maximum impact. Animated text can also make your Shorts more dynamic.
6. Audio Polish
Even if viewers watch without sound, good audio is still critical when they do turn it on.
- Adjust Levels: Ensure your voice is clear and prominent.
- Remove Noise: Use noise reduction tools if your original stream had background distractions.
- Add Music (Optional): Trending, copyright-free music can elevate your Short. Ensure it complements, not distracts from, your main audio.
7. Export in High Quality
- Format: Export as an MP4 file.
- Codec: H.264.
- Bitrate: Aim for 10-15 Mbps for a crisp 1080p vertical video.
- Resolution: 1080x1920 (or higher, if your source footage allows).
8. Upload to YouTube
- Upload your newly edited vertical video.
- Crucially, include
#shortsin the video title and description. This helps YouTube's algorithm identify it as a Short and surface it in the Shorts feed.
Optimizing for Discovery: Shorts Best Practices in Action
Beyond the technical steps, the content and strategy for your Shorts are paramount. Here's how to apply best practices:
The First 3 Seconds: Crafting Killer Hooks
This is your make-or-break moment. You have literally seconds to stop the scroll.
- Start with the Climax: Show the finished product, the moment of success or failure, or the "big reveal" upfront. Hook them, then explain how you got there.
- Ask a Provocative Question: Immediately engage curiosity.
- High-Energy Visuals: Quick cuts, dynamic camera movements, or a visually striking scene can grab attention.
- Intriguing Text/Audio: A bold statement or a snippet of trending audio can work wonders. A strong hook is a promise – deliver on it!
Sound & Trend Savvy: Leveraging Trending Audio
Trending audio isn't just background noise; it's a discoverability engine.
- Monitor Trends: Regularly check the 'Trending' section of the YouTube Audio Library.
- Creative Adaptation: Don't just slap a trending sound on unrelated content. Adapt the trend creatively to your niche, putting your unique spin on it.
- Act Early: Jump on trends early in their lifecycle for maximum algorithmic boost.
- Clarity First: If using trending audio, ensure your original voiceover or important sound effects remain clear and audible over the music.
Keep it Snappy: Optimal Length & Retention
While Shorts allow up to 60 seconds, shorter is often better for retention.
- Aim for 15-45 Seconds: This sweet spot often yields higher completion rates.
- Plan for Brevity: Design your Shorts content from the ground up for conciseness.
- Analyze Drop-Offs: Use YouTube Analytics (specifically the 'Audience Retention' graph for Shorts) to identify exactly where viewers stop watching. If it's consistently at 10 seconds, your next Short needs to be tighter or have a stronger middle.
- Dynamic Pacing: Use quick cuts, jump cuts, and dynamic transitions to keep the energy high and avoid lulls.
Speak Without Sound: Captions & Text Overlays
As covered earlier, this is a non-negotiable for accessibility and engagement. Assume viewers have sound off. Use your text to tell the story, ask questions, or provide critical context.
Tell a Mini-Story: Narrative Arc
Even in under a minute, a compelling narrative creates an emotional connection.
- Beginning, Middle, End: Introduce a problem or question, show the process or build intrigue, and deliver a satisfying payoff or answer.
- Show, Don't Tell: Use strong visuals to convey information rather than relying solely on voiceover.
- The Twist: Consider ending with a surprising twist or an unexpected revelation to maximize watch-throughs.
Encourage Interaction: Effective CTAs
Don't let passive viewing be the end of the story. CTAs turn viewers into engaged community members.
- Timing is Key: Place your CTA after delivering value, at a peak engagement moment.
- Natural Language: Integrate CTAs conversationally, "What's your biggest streaming challenge? Let me know in the comments!"
- Pattern Interrupts: Use visual pop-ups, animated text, or unique verbal cues to make your CTA stand out.
- Reinforcement: Combine visual (text, graphics) and verbal cues for your CTA.
Build Anticipation: Consistent Posting Schedule
Regular, predictable content fosters audience expectation and signals an active, healthy channel to the YouTube algorithm.
- Sustainable Frequency: Aim for a schedule you can realistically maintain, like 3-5 Shorts per week. Quality over quantity, but consistency is a close second.
- Batch Create: Repurpose multiple Shorts from one live stream to stay ahead.
- Schedule Uploads: Use YouTube's scheduling feature to automate your release.
- Audience Active Times: Check YouTube Analytics to see when your audience is most active and schedule uploads accordingly.
Connect & Grow: Engaging with Comments
The comments section is a goldmine for direct audience feedback and a strong signal to the algorithm.
- Respond Promptly: Aim to respond to comments within hours, especially on new Shorts.
- Thoughtful Engagement: Go beyond "thanks!" Ask follow-up questions to spark further discussion.
- Pin Insightful Comments: Highlight great comments to encourage more engagement.
- Video Replies: Use YouTube's feature to reply to comments with a new Short, fostering a deeper connection.
The Data Donut: Analyzing & Iterating for Growth
Your most powerful tool for improvement is YouTube Analytics. Don't just post and forget; analyze, learn, and adapt.
- Retention is King: For Shorts, focus heavily on the "Average percentage viewed." This metric reveals how long viewers stick around. A high percentage indicates an engaging Short.
- Identify Weak Points: If retention drops sharply at a specific timestamp, examine that moment. Was the hook weak? Did the pacing slow down? Was the information unclear?
- Winning Formulas: Compare your top-performing Shorts. What common elements do they share? (Topic, editing style, audio choice, CTA placement, type of hook).
- A/B Test Elements: Experiment! Try different hooks, different lengths, different CTAs. Observe the data to see what performs best.
- Traffic Sources: Understand where your Shorts viewers are coming from (Shorts feed, YouTube search, external). This can inform your content strategy.
- Weekly Routine: Dedicate time each week to review your Shorts performance. This continuous feedback loop is essential for sustainable growth.
Your Growth Loop: Create, Post, Analyze, Iterate
Building a successful presence on YouTube Shorts, especially when repurposing live content, is not about chasing one viral hit. It's about establishing a robust, repeatable process:
- Create with Intent: Design your live streams with an eye toward repurposing. Can you easily extract compelling vertical clips?
- Post with Consistency: Stick to your schedule to build audience expectation and algorithmic trust.
- Analyze with Curiosity: Deep dive into your data, particularly audience retention graphs, to understand viewer behavior.
- Iterate with Precision: Apply those learnings to your next batch of Shorts, refining your hooks, pacing, and calls-to-action.
This loop doesn't just generate content; it builds an asset: a growing content library, a loyal community, and a stronger personal brand. Start by implementing just 2-3 of these practices, track your results diligently, and let the data guide your evolution.
Next Steps: Starting Your Shorts Journey
You now have a comprehensive roadmap. The journey to Shorts optimization, particularly from live streams, requires both technical mastery and creative storytelling. Don't be overwhelmed; start small.
- Confirm Your Setup: Ensure your hardware and software are correctly configured for live streaming. Do a private test stream!
- Plan Your Repurpose: As you live stream, keep an eye out for "Shorts moments." Even jot down timestamps during your stream.
- Master the Vertical Crop: Practice in your editing software. This is a critical skill for Shorts.
- Focus on the Hook: Consciously craft your first 3 seconds for every Short you create.
- Look at Your Data: Make a habit of checking YouTube Analytics for every Short you upload. What do your viewers love? What makes them scroll away?
By embracing this strategy, you're not just streaming; you're building a multi-faceted content machine designed for discovery and engagement in the dynamic world of YouTube Shorts. Go forth and create!